Sunday, May 19, 2013

Finishing the StarBay and Zeiss Model


Time flies!  I apologize for the hiatus in posting and appreciate your patience; between finishing up the major parts of the program, preparing for and carrying out the 50th Anniversary of the Planetarium Celebration Week and finishing my Masters degree this poor little blog slipped through the cracks.  I've got some great (in my opinion) updates for you all though!

Building accessible and durable casework took a bit of planning but it was worth it.


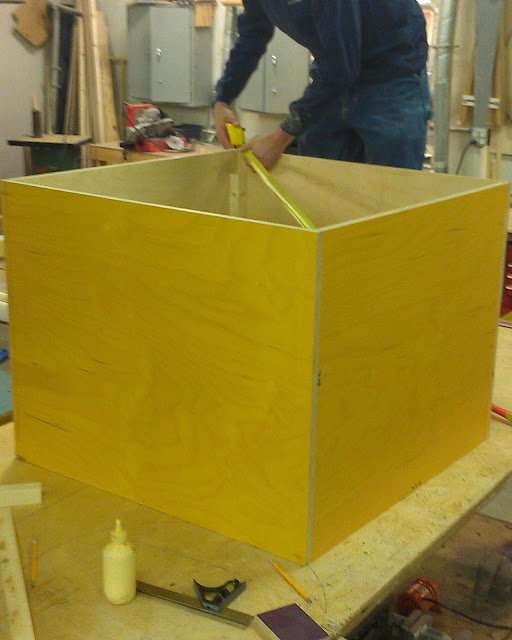
On a table sits to pieces of wood at a right angle.  Each is yellow and measures 34 inches by 34 inches by 34 inches.  There is a long metal weight along the piece lying parallel with the table to help support the one that is perpendicular to the table.  There is a belt sander in the background which has a wheel about half way up a post that has the belt used for sanding on it.  There are also grey cabinets along the walls.
The casework starts coming together


On a table sits the casework.  It is a yellow box with no top that measures 34" by 34" by 34".  A young man in a long sleeved dark blue shirt stands behind it on the table measuring the diagonal distance between two points on the top of the box with a yellow tape measure.  A bottle of yellow colored wood glue can be seen in front of the box and the grey cabinets can be seen on the wall in the background.
A box is formed


On top of a wooden work table is the top of the casework.  It is basically a lid of yellow wood measuring 34" by 34" by 34" with a lip about two inches wide by one inch thick.  This is the bottom side of the lid.  In the center is a black Sharpie sketch of the Zeiss star projector - an oval ball on stilts with eight square boxes in front of it.  Next to the lid is a yellow tape measure and a young man's hand rests on top of the lid.
The top is made
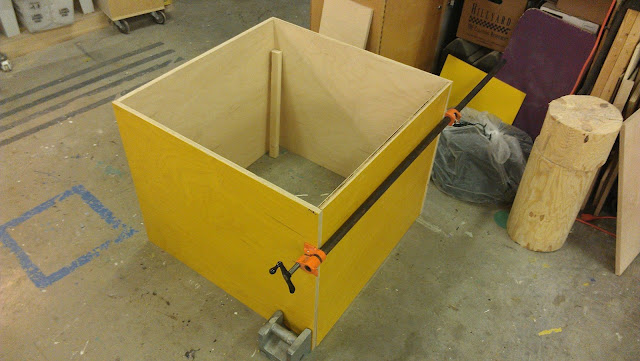
A large yellow wooden box of 34" x 34" x 34" sits on the ground with a large black clamp and a silver square weight holding it together.  There is no top or bottom yet to the box so a thin piece of wood about two feet long can be seen in the box leaning against the side.  The floor is a grey concrete and there are paint splatters on the floor.  There are cardboard boxes behind the wooden box and a sanded down wooden post as well.
Casework being assembled


A young man wearing a blue long sleeved shirt's arms can be seen.  He is wearing plastic cloves and using a dark green spray gun with a back cord to spray a whispy yellow adhesive to the brown back of the laminate.  Another young man's hands can be seen holding the laminate while the other young man sprays.
Applying adhesive to the back of the black laminate


The casework lies on its side and the inside of the box can be seen, and now there is a bottom to it.  One young man in a dark blue long sleeved shirt is smoothing down the laminate as the other young man in the same shirt slowly lowers the black laminate down on the box.
The black laminate is applied to the wooden casework
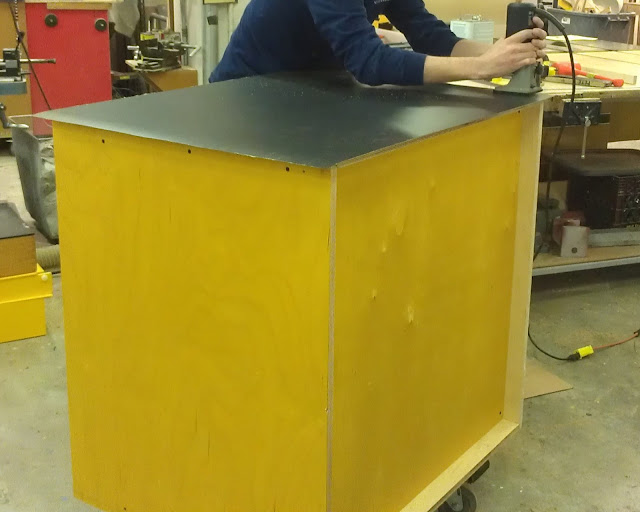
Once the laminate has been applied, what hangs off the edge of the box must be cut.  A young man in a dark blue long sleeved shirt is using a router - black cylinder with a sharp silver rotating bit - to cut off the excess black laminate from the yellow box.
The black laminate is is trimmed to size


The crescent shape of what will become the Planetarium's walls is sitting on a wooden table with blue paint splatters on it.  The concave curve of the walls has a green putty like material on it preparing it for paint.  There is a piece of cardboard next to the wall with the green putty in a puddle and two popsicle sticks that have been dipped in it to apply it to the wall.
The Planetarium's walls are prepared for paint


Once the casework was built and the walls of the Planetarium ready and waiting for the dome to arrive, it was time to continue figuring out how to cast our mini Zeiss.  The process required the creation of a positive which was then submerged in the silicon material that would solidify to become the mold.  


The hands of a young man wearing clear plastic gloves are seen pouring a thick blue liquid with the help of a stick out of an opaque white container with measurement marks along the side.  The liquid is collecting in a purple wooden box and covering the positive which is now not visible.  The box sits on a wooden table in the shop with an orange metal clamp near by and two more pieces of the purple wood.  In the background is a tactile model of the Planetarium building from the outside - a curved shape called a single-sheet hyperboloid.
Making the Mold


When the positive is removed, the mold is ready to use, at which point the casting can begin.  The casting liquids are mixed and poured into the mold where they set as hard as a rock, creating the model.
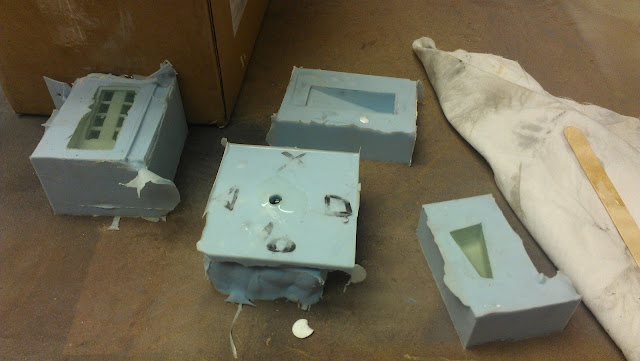


On a grayish brown table sits a cardboard box and a rag with a stick on it.  There are also four blue rubbery molds, each one a rectangular shape.  In each mold is a different shape though; a couple wedges of different sizes, a rectangle with eight perpendicular rectangles sticking out of it, and another with a blue rubber lid on it with a whole and a triangle, circle, square and x marking each side of the lid.  All but one wedge are filled with a clear, yellowish liquid that will soon solidify and turn hard and white to become the model.
The Model is Poured and Cast from the Molds


It took a few tries as you may have seen in previous posts...


A Zeiss StarBall that did not form properly out of the mold sits on a red palette.  There is half of a white casting of the Zeiss StarBall that is half an oval ball with many raised circles for "lenses" sits in a puddle of white casting material.  It looks as if the Starball melted.
Half of a Zeiss StarBall
In the end though, the final product turned out great.


On a piece of light brown wood sits a successfully cast piece of the model - the Planet Projectors.   These are white and there are eight vertical boxes that are in two rows of four and measure about one inch high and two inches long.  They sit on top of the blue rubber mold they came out of which is a square of about 4 inches by four inches by three inches.  The impression of the cast model can be seen in the mold's center.
Success for the Planet Projectors!


Around the time the casting was wrapping up was when the dome finally arrived.  It came clear and cut in half as we desired.  A map of the Northern Hemisphere's night sky when fall is turning to winter was printed out and I drew the constellations on the dome with Sharpie.  Ian was then able to drill holes where the stars (painted rivets) would go.
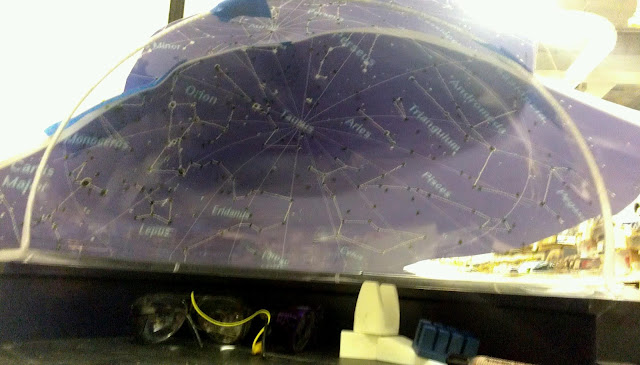


The clear half dome has a piece of blue paper covering the outside of it.  On the paper that can be seen through the dome are constellations.  Each star on the paper has been marked on the inside of the dome with green pen.  The dome sits on top of the finished planetarium dome with an unfinished model of the Zeiss and a pair of safety goggles.  The walls of the planetarium are dark purple and the floor is the black laminate at the moment.
The dome gets mapped


The dome was then painted black and many rivets of different sizes were painted white (with a blue one for Sirius, an orange one for Aldebaran and a red one for Betelgeuse).  


The dome has been painted black but specks of white light can be seen from where the holes were drilled for the rivet stars to be inserted later.  The black dome sits upon the purple curved wall of the Planetarium and the floor is now a grey carpet just like what is in the real planetarium.  The black laminate that it sits upon is a little dusty from being in the Exhibit Production shop and fingerprints can be noticed here and there on the casework because of the sawdust.
Holes for the stars are drilled and the dome is painted black


The rivets turned stars were then cemented into the previously drilled holes in the dome, creating the tactile stars.


The exhibit text also had to be created at this time.  The text needed to be descriptive and explanetory, but also concise so that both the large print and Braille would fit.  Our wonderful volunteer, Deb,created all the Braille we needed from the text I wrote.  Ian then took the Braille and created mold and cast our exhibit panels with the Braille on it.  
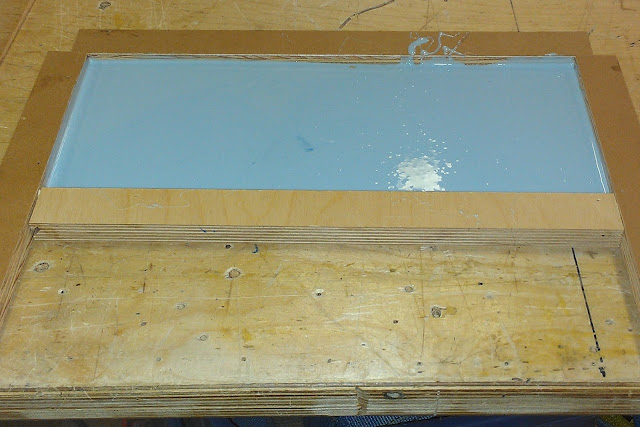


A rectangular box of about 5" by 9" sits on a wooden table.  In the box is the blue mold making material.  It is over a piece of plastic with the desired Braille for the exhibit text and will create the mold for the cast of the exhibit text that will go on display.
The mold for the Braille exhibit text is made

Mr. Smith very kindly helped us get the printed text set up to be back printed on no-glare plex.


In large print and Braille reads the following exhibit signage: "The Zeiss Star Projector.  The object in the center of the StarBay is the star projector.  Pinpoints of light from the ball (Exhibit1) create stars.  The eight separate boxes (Exhibit 2) focus light in the form of planets, the sun and Moon."
Exhibit text explaining the Zeiss Star Projector


In large print and Braille reads the following exhibit signage: "Touch the Night Sky.  This is a model of the James S. McDonnell Planetarium's Orthwein StarBay.  Feel the night sky on the inside of the model's half dome."
Exhibit text explaining the purpose of the model


In large print and Braille reads the following exhibit signage: "Can You Recognize the Constellation?  Groups of stars create the constellations our culture recognizes, like the constellation Orion the Hunter to the right."  To the right of the text is a raised version of the constellation Orion like what would be found inside the dome made of black rivets on the white panel of text.
Exhibit text explaining the constellation


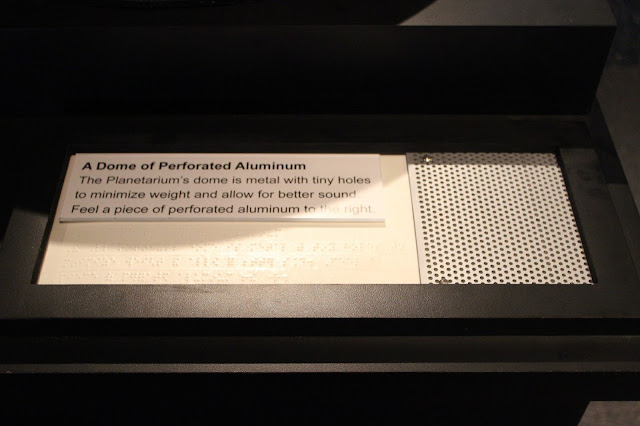
In large print and Braille reads the following exhibit signage: "A Dome of Perforated Aluminum.  The Planetarium's dome is metal with tiny holes to minimize weight and allow for better sound.  Feel a piece of perforated aluminum to the right."  To the right of the text is a piece of silver aluminum with many small holes in it for visitors to feel.
Exhibit text about the dome


It was then time to assemble everything.  


A young man's hands can be seen holding a white rag and carefully wiping down the black laminate of the casework; preparing it to roll out on the floor.
The casework gets spruced up for its opening


On top of the lid of the casework sits the purple wall of the Planetarium model with out the dome on top.  On the grey carpet in the middle sits the pieces of the Zeiss model waiting to be assembled and fastened to the floor of the model.  There are the two smaller black wedges and the long black wedge as well as the now teal colored eight vertical boxes for the planet projectors and the oval ball on stilts for the StarBall which are also teal.  There is also a white Allen wrench set sitting on the carpet.  Around the sides of the walls, also on the black lid of the casework, sits the white text panels that contain the Braille exhibit text.
Some assembly required...


On top of the lid of the casework sits the purple wall of the Planetarium model now with the dome on top .  On the grey carpet in the middle sits the Zeiss model which is now assembled and fastened to the floor of the model.  There are the two smaller black wedges and the long black wedge as well as the now teal colored eight vertical boxes for the planet projectors and the oval ball on stilts for the StarBall which are also teal sitting on top of the three black wedges.  There is also a white piece of paper sitting on the carpet which is holding all the extra rivets and hardware needed to secure everything.  Around the sides of the walls, also on the black lid of the casework, sits the white text panels that contain the Braille exhibit text.  A young man's hands can be seen fastening the dome to the walls.  All the stars are secured in the dome as well.
The dome is secured


The model is now out in the Planetarium's lower level in the lobby!  The black dome with all the stars of white rivets sits upon the purple wall and grey carpet.  In the middle is the Zeiss model.  The teal oval StarBall on stilts sits on the two smaller black wedges and the teal eight planet projector vertical boxes sit on the long black wedge.  Next to it on the carpet sits a small white exhibit text panel of about three inches by one-and-a-half inches.  It has Braille and large print marking the StarBall as exhibit one and the Planet Projectors as exhibit two to correspond to the other exhibit text.
Ready for my close-up!


The exhibit is now out in the Planetarium lobby.  Other casework that is light brown can be seen behind it in the background as well as a black wall and a red pillar.  The black box casework sits at about 34" by 34" by 34".  On the front wrapping around the corner to the right side of the casework is the curved single sheet hyperboloid shape of the Planetarium in white.  On the top of the casework is the black dome with all the stars of white rivets sits upon the purple wall and grey carpet.  In the middle is the Zeiss model.  The teal oval StarBall on stilts sits on the two smaller black wedges and the teal eight planet projector vertical boxes sit on the long black wedge.  Next to it on the carpet sits a small white exhibit text panel of about three inches by one-and-a-half inches.  It has Braille and large print marking the StarBall as exhibit one and the Planet Projectors as exhibit two to correspond to the other exhibit text.  To the right of the model is the exhibit text.  There are three visible rectangles of large print and Braille text framed by black.
Waiting for its first visitors to arrive!


Words truly cannot express how excited I am about how well this turned out in the end.  It seems just like a mini version of the real StarBay and Zeiss Projector!  So many people brought it to life.  I have to give huge thanks to Lighthouse for the Blind Saint Louis for generously funding the project.  A big thank you to Dave in Electronics, Chris in Production, Justin for your advice, Pete and Thom for you extra hands and help, and Mr. Smith for your advice and help as well.  Deb, so much thanks goes to you for your consulting, your advice and all the Brailling you did.  Finally, thank you Ian.  When I told you my idea and gave you the drawings for this exhibit, I never guessed it would turn out even better than I could have imagined.  You brought this model to life.

Since the model has gone on display,  visitors who are blind or have low vision and visitors with sight have both explored the model with their hands, prompting questions from children and adults alike about the Planetarium as well as Braille.


If you are in Saint Louis, you can experience the exhibit yourself in the lobby of the Planetarium at the Saint Louis Science Center.

No comments:

Post a Comment