Monday, May 20, 2013

The Tactile Follow-Along Books are Bound and Beautiful!

The books are DONE!  Let me tell you, even though each page only takes 5 seconds to form, the 25 tactile pages per book did not take just a few minutes to make (as a certain blog author thought they would).  In other words, the books took a smidge longer to create than I expected, especially with a few hiccups along the way.

My original molds, first off, started falling apart with repeated use and subjection to extreme heat.  Luckily though, thanks to the knowledge I gained from watching the model being built, I knew how to cast new and more durable plastic molds to use from old pages.  Man was that a lifesaver!  


On a desk sits a tan colored piece of Braillon paper (a plastic feeling paper) with the image of Little Star (a circle with a face and rays of light like spikes coming out of the circle).  On the paper is a white cup with a trial of white plastic that is about 1/4 inch thick in diameter extending to a blob of the white resin substance that rests in the face of Little Star on the Braillon paper.  The blob is about 1.5 inches in diameter and about half the size of the star's face that it is supposed to cover.
Oops... the resin solidified faster than I expected!

On a green cutting board sits two pages of tan Braillon.  Each page is acting like a mold.  The page on the left has two of Mars' moons (lopsided and oval in shape), a canyon (oval and bumpy with a smooth crevice in the middle), and a 2.5 inch in diameter circle filled with the white casting resin that will become the new mold of the character of Mars.  The page on the right features Little Star being born and the white resin is pooled in a smaller circle of about 1.5 inches in diameter and in curved lines spreading away from the circle - 3 on each side).
Take two... The resin is poured into the pages of Braillon in time and is now starting to solidify in the shape of the characters on the pages.


A tan page of Braillon shows the face of the character of Mars raised out of the page.  He is about 2.5 inches in diameter and has two large open eyes, a big nose and a wide open smile with a small chin.  Next to him on the right is a white duplicate of him sitting on top of the Braillon - this is the new mold that will be used to create more pages of Braillon with the tactile image of Mars.
Success!  mars now has a new mold to create many more tactie pages!


In the end, 25 new molds were made and after an entire day, all the tactile pages were created.


Finally, a screen shot from each scene of the show was taken and turned into its own page with large print that says exactly what the Braille says on the tactile page.   This created the complimentary page to make "twin-vision" in the book so that anyone, no matter their ability to read Braille or print or to feel images or see them, can use the books.


Each page for all seven books was then placed in the correct order and I headed off to Office Depot the next morning.  They were BEYOND kind in helping get the regular paper pages laminated and all the books bound together.  They are absolutely BEAUTIFUL!


Sitting on a desk of dark wood is a completed tactile follow-along twin vision book for The Little Star That Could Planetarium Show.  The book has a black spiral binding on the left side and the cover, which is all that is visible of the book, is tan and plastic-like Braillon.  It has the raised image of the Little Star That Could show poster, featuring Little Star, a circle of about 2.5 inches in diameter with a smiling face and rays protruding from the circle, Mr. Angry Blue-White Star, a circle of about 1 inch in diameter with a frowning face and rays protruding from the circle, Big Daddy, a circle of about 1 inch in diameter with a smiling face, sunglasses and rays protruding from the circle, and Pearl, a circle of about 1 inch in diameter with a smiling face and rays protruding from the circle.  The title, "The Little Star That Could," appears in contracted Braille at the top of the cover, with the tag line, "Sometimes being average can also be special," in contracted Braille below the raised images of the stars.
The Tactile Follow-Along Twin Vision book is complete! :D

The tactile follow-along twin vision book lays open to the pages where Little Star meets Mr. Old-Timer Orange Star.  On the left page is a color image of the two characters meeting from the video.  The Orange star is on the left, a circle of about 1 inch in diameter with a wrinkled face and white mustache, Little Star the yellow star is on the right, a circle of about 1/2 inch in diameter with a face holding a smile.  Each character is labeled in large print and large print also appears above the image reading: Little Star meets Mr. Old-Timer Orange Star.  Below is "Page 3" in Large print as well.  The same image appears on the right page, but this time the image is on Braille and it is raised so that the detail can be felt.  The same titles also appear in contracted Braille, with only the page number changing from 3 to 4.
Little Star meets Mr. Old-Timer Orange Star... in large print AND Braille!


The tactile follow-along books is now open to the next two twin vision pages.  On the right page near the top in large print is the caption "Mr. Old-Timer Orange Star is the star Arcturus in the constellation Bootes the Herdsman.  Below the print is a diagram of the constellation that looks a bit like connect the dots to form a drawing that looks like a kite.  An arrow points to Arcturus, which is an orange star in the diagram at the base of the diamond part of the kite where the tail would attach.  Page 5 is at the bottom left side of the page.  On the left side of the book, the same caption appears at the top of the page in contracted Braille and the same constellation drawing appears, but raised from the Braillon with a tactile arrow pointing to the star Arcturus.  Page 6 is at the bottom right side of the page in Braille.
Every star is based off of a star in the real night sky, so this is also noted in the book in both large print and Braille


The book is open to a page later in the tactile book.  On the right page is the image of the character of the planet, Mars.  He is a circle of about 3 inches with raised eyebrows, relaxed eyes, a large nose and a wide open smile.  Below him are images of Mars' moons, phobos and demos as well as Valles Marineris, the canyon on Mars.  Each image is labeled in large print and at the top of the page in large print is the caption, "Little Star meets Mars."  At the bottom of the page on the left is "Page 43."  The page on the right contains the same images raised up from the Braillon page.  Each is labeled in contracted Braille as is the caption at the top of the page.  Page 44 is in Braille on the bottom right side of the page.
Little Star meets Mars and learns about the planet's physical features and its moons


A big thank you again to Lighthouse for the Blind Saint Louis, Thom and Ian for your help in learning how to make molds, Deb for your fantastic work in Brailling (and helping me learn to read Braille so I knew what I was doing!), and Jo from Delta Gamma Saint Louis and the TVIs from Saint Louis' Special School District for your advice on how to best create the twin vision books!  A very special thank you as well to the technicians at Office Depot who looked at my unbound pages, asked me, "You want us to do what?!" and then took on the challenge to polish the pages into beautiful books.  I couldn't have created these books without you all!

Sunday, May 19, 2013

Finishing the StarBay and Zeiss Model


Time flies!  I apologize for the hiatus in posting and appreciate your patience; between finishing up the major parts of the program, preparing for and carrying out the 50th Anniversary of the Planetarium Celebration Week and finishing my Masters degree this poor little blog slipped through the cracks.  I've got some great (in my opinion) updates for you all though!

Building accessible and durable casework took a bit of planning but it was worth it.


On a table sits to pieces of wood at a right angle.  Each is yellow and measures 34 inches by 34 inches by 34 inches.  There is a long metal weight along the piece lying parallel with the table to help support the one that is perpendicular to the table.  There is a belt sander in the background which has a wheel about half way up a post that has the belt used for sanding on it.  There are also grey cabinets along the walls.
The casework starts coming together


On a table sits the casework.  It is a yellow box with no top that measures 34" by 34" by 34".  A young man in a long sleeved dark blue shirt stands behind it on the table measuring the diagonal distance between two points on the top of the box with a yellow tape measure.  A bottle of yellow colored wood glue can be seen in front of the box and the grey cabinets can be seen on the wall in the background.
A box is formed


On top of a wooden work table is the top of the casework.  It is basically a lid of yellow wood measuring 34" by 34" by 34" with a lip about two inches wide by one inch thick.  This is the bottom side of the lid.  In the center is a black Sharpie sketch of the Zeiss star projector - an oval ball on stilts with eight square boxes in front of it.  Next to the lid is a yellow tape measure and a young man's hand rests on top of the lid.
The top is made
A large yellow wooden box of 34" x 34" x 34" sits on the ground with a large black clamp and a silver square weight holding it together.  There is no top or bottom yet to the box so a thin piece of wood about two feet long can be seen in the box leaning against the side.  The floor is a grey concrete and there are paint splatters on the floor.  There are cardboard boxes behind the wooden box and a sanded down wooden post as well.
Casework being assembled


A young man wearing a blue long sleeved shirt's arms can be seen.  He is wearing plastic cloves and using a dark green spray gun with a back cord to spray a whispy yellow adhesive to the brown back of the laminate.  Another young man's hands can be seen holding the laminate while the other young man sprays.
Applying adhesive to the back of the black laminate


The casework lies on its side and the inside of the box can be seen, and now there is a bottom to it.  One young man in a dark blue long sleeved shirt is smoothing down the laminate as the other young man in the same shirt slowly lowers the black laminate down on the box.
The black laminate is applied to the wooden casework
Once the laminate has been applied, what hangs off the edge of the box must be cut.  A young man in a dark blue long sleeved shirt is using a router - black cylinder with a sharp silver rotating bit - to cut off the excess black laminate from the yellow box.
The black laminate is is trimmed to size


The crescent shape of what will become the Planetarium's walls is sitting on a wooden table with blue paint splatters on it.  The concave curve of the walls has a green putty like material on it preparing it for paint.  There is a piece of cardboard next to the wall with the green putty in a puddle and two popsicle sticks that have been dipped in it to apply it to the wall.
The Planetarium's walls are prepared for paint


Once the casework was built and the walls of the Planetarium ready and waiting for the dome to arrive, it was time to continue figuring out how to cast our mini Zeiss.  The process required the creation of a positive which was then submerged in the silicon material that would solidify to become the mold.  


The hands of a young man wearing clear plastic gloves are seen pouring a thick blue liquid with the help of a stick out of an opaque white container with measurement marks along the side.  The liquid is collecting in a purple wooden box and covering the positive which is now not visible.  The box sits on a wooden table in the shop with an orange metal clamp near by and two more pieces of the purple wood.  In the background is a tactile model of the Planetarium building from the outside - a curved shape called a single-sheet hyperboloid.
Making the Mold


When the positive is removed, the mold is ready to use, at which point the casting can begin.  The casting liquids are mixed and poured into the mold where they set as hard as a rock, creating the model.


On a grayish brown table sits a cardboard box and a rag with a stick on it.  There are also four blue rubbery molds, each one a rectangular shape.  In each mold is a different shape though; a couple wedges of different sizes, a rectangle with eight perpendicular rectangles sticking out of it, and another with a blue rubber lid on it with a whole and a triangle, circle, square and x marking each side of the lid.  All but one wedge are filled with a clear, yellowish liquid that will soon solidify and turn hard and white to become the model.
The Model is Poured and Cast from the Molds


It took a few tries as you may have seen in previous posts...


A Zeiss StarBall that did not form properly out of the mold sits on a red palette.  There is half of a white casting of the Zeiss StarBall that is half an oval ball with many raised circles for "lenses" sits in a puddle of white casting material.  It looks as if the Starball melted.
Half of a Zeiss StarBall
In the end though, the final product turned out great.


On a piece of light brown wood sits a successfully cast piece of the model - the Planet Projectors.   These are white and there are eight vertical boxes that are in two rows of four and measure about one inch high and two inches long.  They sit on top of the blue rubber mold they came out of which is a square of about 4 inches by four inches by three inches.  The impression of the cast model can be seen in the mold's center.
Success for the Planet Projectors!


Around the time the casting was wrapping up was when the dome finally arrived.  It came clear and cut in half as we desired.  A map of the Northern Hemisphere's night sky when fall is turning to winter was printed out and I drew the constellations on the dome with Sharpie.  Ian was then able to drill holes where the stars (painted rivets) would go.


The clear half dome has a piece of blue paper covering the outside of it.  On the paper that can be seen through the dome are constellations.  Each star on the paper has been marked on the inside of the dome with green pen.  The dome sits on top of the finished planetarium dome with an unfinished model of the Zeiss and a pair of safety goggles.  The walls of the planetarium are dark purple and the floor is the black laminate at the moment.
The dome gets mapped


The dome was then painted black and many rivets of different sizes were painted white (with a blue one for Sirius, an orange one for Aldebaran and a red one for Betelgeuse).  


The dome has been painted black but specks of white light can be seen from where the holes were drilled for the rivet stars to be inserted later.  The black dome sits upon the purple curved wall of the Planetarium and the floor is now a grey carpet just like what is in the real planetarium.  The black laminate that it sits upon is a little dusty from being in the Exhibit Production shop and fingerprints can be noticed here and there on the casework because of the sawdust.
Holes for the stars are drilled and the dome is painted black


The rivets turned stars were then cemented into the previously drilled holes in the dome, creating the tactile stars.


The exhibit text also had to be created at this time.  The text needed to be descriptive and explanetory, but also concise so that both the large print and Braille would fit.  Our wonderful volunteer, Deb,created all the Braille we needed from the text I wrote.  Ian then took the Braille and created mold and cast our exhibit panels with the Braille on it.  


A rectangular box of about 5" by 9" sits on a wooden table.  In the box is the blue mold making material.  It is over a piece of plastic with the desired Braille for the exhibit text and will create the mold for the cast of the exhibit text that will go on display.
The mold for the Braille exhibit text is made

Mr. Smith very kindly helped us get the printed text set up to be back printed on no-glare plex.


In large print and Braille reads the following exhibit signage: "The Zeiss Star Projector.  The object in the center of the StarBay is the star projector.  Pinpoints of light from the ball (Exhibit1) create stars.  The eight separate boxes (Exhibit 2) focus light in the form of planets, the sun and Moon."
Exhibit text explaining the Zeiss Star Projector


In large print and Braille reads the following exhibit signage: "Touch the Night Sky.  This is a model of the James S. McDonnell Planetarium's Orthwein StarBay.  Feel the night sky on the inside of the model's half dome."
Exhibit text explaining the purpose of the model


In large print and Braille reads the following exhibit signage: "Can You Recognize the Constellation?  Groups of stars create the constellations our culture recognizes, like the constellation Orion the Hunter to the right."  To the right of the text is a raised version of the constellation Orion like what would be found inside the dome made of black rivets on the white panel of text.
Exhibit text explaining the constellation


In large print and Braille reads the following exhibit signage: "A Dome of Perforated Aluminum.  The Planetarium's dome is metal with tiny holes to minimize weight and allow for better sound.  Feel a piece of perforated aluminum to the right."  To the right of the text is a piece of silver aluminum with many small holes in it for visitors to feel.
Exhibit text about the dome


It was then time to assemble everything.  


A young man's hands can be seen holding a white rag and carefully wiping down the black laminate of the casework; preparing it to roll out on the floor.
The casework gets spruced up for its opening


On top of the lid of the casework sits the purple wall of the Planetarium model with out the dome on top.  On the grey carpet in the middle sits the pieces of the Zeiss model waiting to be assembled and fastened to the floor of the model.  There are the two smaller black wedges and the long black wedge as well as the now teal colored eight vertical boxes for the planet projectors and the oval ball on stilts for the StarBall which are also teal.  There is also a white Allen wrench set sitting on the carpet.  Around the sides of the walls, also on the black lid of the casework, sits the white text panels that contain the Braille exhibit text.
Some assembly required...


On top of the lid of the casework sits the purple wall of the Planetarium model now with the dome on top .  On the grey carpet in the middle sits the Zeiss model which is now assembled and fastened to the floor of the model.  There are the two smaller black wedges and the long black wedge as well as the now teal colored eight vertical boxes for the planet projectors and the oval ball on stilts for the StarBall which are also teal sitting on top of the three black wedges.  There is also a white piece of paper sitting on the carpet which is holding all the extra rivets and hardware needed to secure everything.  Around the sides of the walls, also on the black lid of the casework, sits the white text panels that contain the Braille exhibit text.  A young man's hands can be seen fastening the dome to the walls.  All the stars are secured in the dome as well.
The dome is secured


The model is now out in the Planetarium's lower level in the lobby!  The black dome with all the stars of white rivets sits upon the purple wall and grey carpet.  In the middle is the Zeiss model.  The teal oval StarBall on stilts sits on the two smaller black wedges and the teal eight planet projector vertical boxes sit on the long black wedge.  Next to it on the carpet sits a small white exhibit text panel of about three inches by one-and-a-half inches.  It has Braille and large print marking the StarBall as exhibit one and the Planet Projectors as exhibit two to correspond to the other exhibit text.
Ready for my close-up!


The exhibit is now out in the Planetarium lobby.  Other casework that is light brown can be seen behind it in the background as well as a black wall and a red pillar.  The black box casework sits at about 34" by 34" by 34".  On the front wrapping around the corner to the right side of the casework is the curved single sheet hyperboloid shape of the Planetarium in white.  On the top of the casework is the black dome with all the stars of white rivets sits upon the purple wall and grey carpet.  In the middle is the Zeiss model.  The teal oval StarBall on stilts sits on the two smaller black wedges and the teal eight planet projector vertical boxes sit on the long black wedge.  Next to it on the carpet sits a small white exhibit text panel of about three inches by one-and-a-half inches.  It has Braille and large print marking the StarBall as exhibit one and the Planet Projectors as exhibit two to correspond to the other exhibit text.  To the right of the model is the exhibit text.  There are three visible rectangles of large print and Braille text framed by black.
Waiting for its first visitors to arrive!


Words truly cannot express how excited I am about how well this turned out in the end.  It seems just like a mini version of the real StarBay and Zeiss Projector!  So many people brought it to life.  I have to give huge thanks to Lighthouse for the Blind Saint Louis for generously funding the project.  A big thank you to Dave in Electronics, Chris in Production, Justin for your advice, Pete and Thom for you extra hands and help, and Mr. Smith for your advice and help as well.  Deb, so much thanks goes to you for your consulting, your advice and all the Brailling you did.  Finally, thank you Ian.  When I told you my idea and gave you the drawings for this exhibit, I never guessed it would turn out even better than I could have imagined.  You brought this model to life.

Since the model has gone on display,  visitors who are blind or have low vision and visitors with sight have both explored the model with their hands, prompting questions from children and adults alike about the Planetarium as well as Braille.


If you are in Saint Louis, you can experience the exhibit yourself in the lobby of the Planetarium at the Saint Louis Science Center.

Thursday, February 14, 2013

Creating the right casework

The model is progressing nicely and pretty soon it is going to need something to hold it.  This is where casework comes in.  The casework you see in museums is many times built to house specific objects and artifacts.  Our casework for the model is no different, and we wanted to make it as accessible as possible.


First and foremost, the casework will be the proper height and have the proper reach for visitors who use wheelchairs, for those who have a smaller stature and children according to ADA specifications.  The casework will also be tactile though for our visitors who are blind or have low vision!  The same preparator who has been working on the model, Ian, came up with the idea of having the shape of the Planetarium itself sticking out on the sides of the casework so visitors can experience what the shape of the the building they are standing in feels like, since it has such a unique shape!  


I quickly drew up what this will look like when complete:


A computer rendering of the model is shown sitting on a black box for the case work with a white version of the planetarium raised about an inch out that wraps around the corner.  The shape of the planetarium is a single-sheet hyperboloid which looks like someone took a tube and pulled out the bottom to be very wide and the top to be about half as wide as the bottom with a bottle neck effect about one-third of the way down from the top.  Half of this image is on the front of the box and the other half wraps around the right side.  On top of the casework sits the model which has a 24" diameter base that is grey with the mini Zeiss of an oval ball on stilts in front of eight vertical boxes (all of the Zeiss is a dark teal).  The half dome extends about 20 inches above and is black.  There is a purple wall between the dome and floor which is about two inches high.  Next to this model are the graphics and exhibit text for the model which in this drawing are represented as tan rectangles.  There are three measurements off the casework that show it is 36" tall by 36" wide and 36" inches long.
The Front View

A computer rendering of the model is shown sitting on a black box for the case work from the top down.  On top of the casework sits the model which has a 24" diameter base that is grey with the mini Zeiss of an oval ball on stilts in front of eight vertical boxes (all of the Zeiss is a dark teal).  The half dome extends about 20 inches above and is black.  There is a purple wall between the dome and floor which is about two inches high.  Next to this model are the graphics and exhibit text for the model which in this drawing are represented as tan rectangles.  There are three measurements off the casework that show it is 36" tall by 36" wide and 36" inches long.
The Top View

A computer rendering of the model is shown sitting on a black box for the case work from the bottom down.  The casework is hollow showing the four casters that it is sitting on and the wood on the inside as the inside remains uncovered by paint or laminate.  There are three measurements off the casework that show it is 36" tall by 36" wide and 36" inches long.
Bottom View


It's a brilliant idea and I think it will make a great addition to the whole program!

Sunday, February 10, 2013

Mini Zeiss

The model of the Zeiss and the StarBay have been progressing and it has been very exciting to see the details emerge from raw materials.The model will actually be produced through casting.  To cast, a mold will be made from a positive (kind of like a very polished rough draft of the final product).  When the mold is made, the casting product (plastic, bronze, etc.) can be poured in to create the final product.  This update will take you through creating a lot of the positive that will create the mold in which the final product, our "Mini Zeiss" tactile, will be produced.
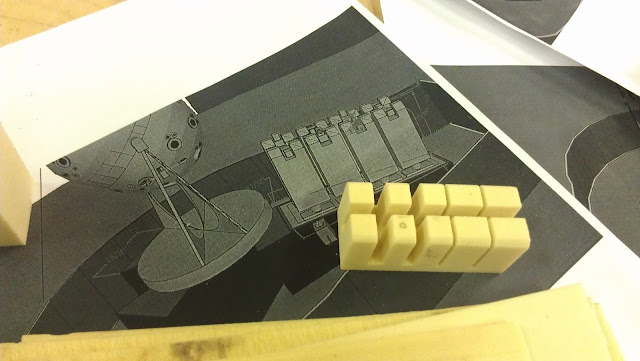

A piece of yellow foam that is about 2.5 inches long sits on top of a black and white computer drawing of the Zeiss Universarium IX projector.  The piece of foam has two 1/8" cuts going width wise and then two more cuts going width wise that are about 1/16" wide.  There is also a quarter inch cut going lengthwise.  There is a two-by-four in the foreground as well.
Testing out some material to create the Zeiss Planet Projectors


The practice planet projectors cut from the block of yellow foam that is about 2.5 inches long and one inch wide sits in the middle of a circle drawn with black on a wood work bench.  It looks very small in the circle.  There is a half circle of wood that has the same diameter as the drawn circle of 24" sitting in the drawn circle as well.  There is another half circle mocking up where the walls will go as it sits on silver metal weights.  On another wood table to the left there is a bottle of wood glue, a red clamp and a black clamp.
Practice Foam Planet Projectors sitting in the mock up of the StarBay


Of course trying to get things looking perfect takes a bit of time and a lot of effort! 
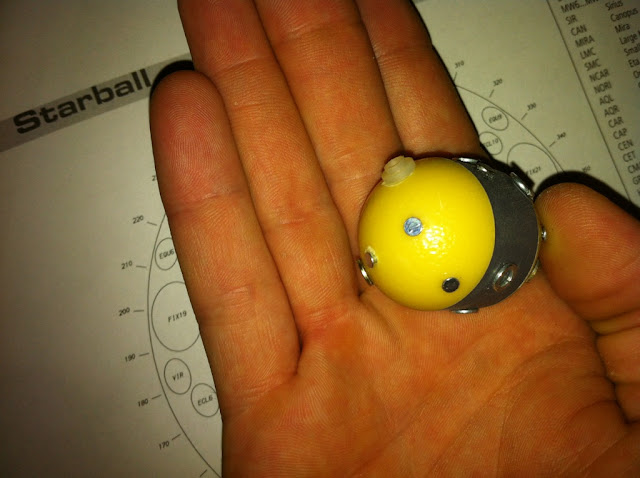
In the background is a white piece of paper with a drawing of a circle that has many other circles all over inside of it.  The page is labeled "Starball" and each of the small circles in the big one is labeled but the font is too small to read.  In the foreground is a hand with it's palm flat and open and resting on it is a small model of the Starball.  It is like a large fat pill or capsule with both ends being yellow and the center being grey.  There are washers and nails all over it to act like small lenses.  The washers and nails are silver metal.
First attempt at creating the starball with accurate lenses


A few different Zeiss positives have been made now until the right size that will be durable enough emerged.
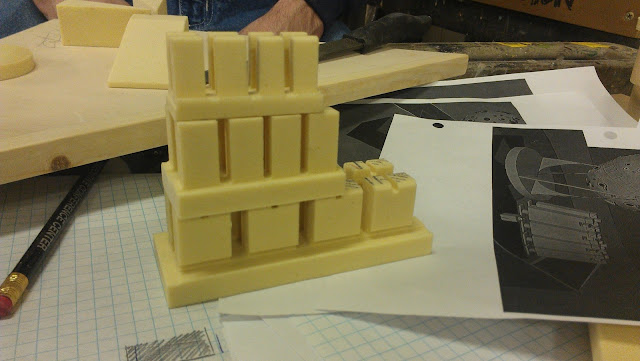
On a grey cart sits many pieces of graph paper and computer drawings of the Zeiss Star Projector in black and white.  The papers cover the top of the cart.  There is also a piece of wood with some wedges of yellow foam sitting on it.  In the foreground is a pencil and three foam versions of the planet projectors.  the smallest is about 1.5 inches long by 1 inch tall with four boxes about .5 inches wide cut into the block.  The medium one has the same shape but is about 2 inches long by 1.5 inches tall.  The biggest is about 3 inches long and 1.5 inches tall.
Different scales of foam planet projectors


Third time's a charm though and now we have the right scale.  Next up was the creation of a Starball that was the right size...
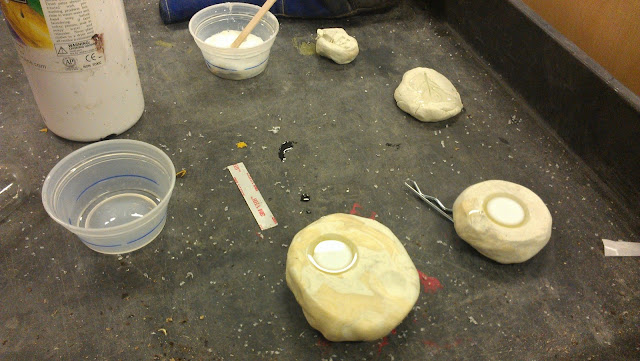
On a grey cart sits two round chunks of clay about the size of an adult's palm and a child's palm.  In each is a dome shaped dent with a diameter of about one inch.  There is a clear plastic starting to solidify from a syrupy liquid the middle of the clear plastic is turning a milky white.  Behind the clay is a white bottle and a couple of small plastic clear cups.
Molding the sides of the Starball

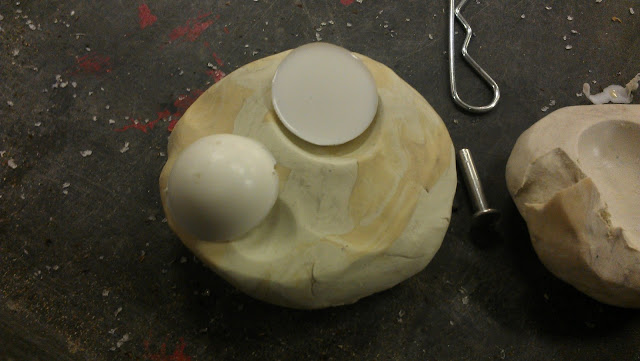
On a black cart sits the round clay mold for the sides of the starball with one dome shaped 1-inch diameter indent.  Two white plastic dome-shapes are sitting on the mold.  there is also a silver metal screw of about one inch, a small metal clamp and another chunk of clay to the right of the main mold.
The sides of the Starball are complete!


A young man in a blue sweatshirt and blue jeans stands in front of a metal table.  On the table is a lathe; it is silver metal and has a large black and yellow caution sign on the side.  It is about a foot tall and 2.5 feet long and one foot wide.  There are a few cranks on the side that the young man is using to control the metal arm with a sharp point that goes back and forth to cut the grey plastic piece that will be the middle of the starball.
Creating the center of the Starball on the lathe

A silver and blue drill press is being used in this picture.  The press stands about 6.5 feet tall and has a large box at the top for the motor.  it is attached at the back to a silver metal pole wit ha diameter of about six inches and has a counter at about four feet.  On top of the counter sits a black box and a piece of yellow foam.  A red bit is being pressed into the foam.  It is connected to a silver metal pole attached to the large box at the top of the machine.  A hand is using the crank to lower the bit into the foam.  Below the machine is a white box with pieces of wood in it.
Making the base for the Starball on the drill press


We want it to be as accurate as possible, so checking it against the real thing now and then never hurts!
In the Planetarium under the large white dome sits the teal colored Zeiss Universarium IX Star Projector.  It is about 15 feet tall, 15 feet long and 10 feet wide.  The starball looks like a giant slightly elongated ball (so that it is not a perfect sphere) and on it are many smaller circles that are lenses.  These lenses cover the entire ball.  It is perched on four legs that hold it to a rotating circular base that sits upon two black wedges.  On a third black wedge that extends in front of the ball are the four planet projectors.  Each one is about 4 feet tall and two feet wide.  The whole thing is enclosed by a blue metal fence.  On a chair in the foreground is the yellow foam and white plastic positive of the Zeiss.  It is about six inches long total, two inches wide and ten inches tall, but it mimics the real projector almost exactly in a smaller scale.
The Mini Zeiss positive meets the real Zeiss


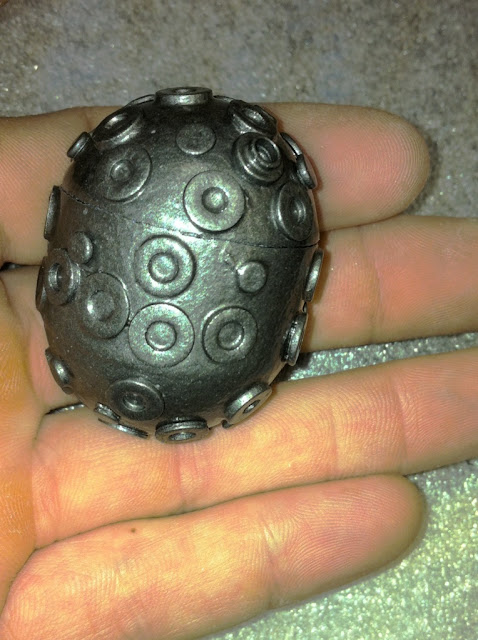
In the open fingers of a left hand sits the Starball positive for the Mini-Zeiss Model.  It has many small washers and nail heads attached to it now to mimic the lenses of the real Zeiss.  It has also been painted with Hammerite which gives it a metallic silver appearance.  It is about 1.5 inches long and 1 inch in diameter.
The Mini Zeiss's Starball positive gets some lenses and a coat of Hammerite

Once again I'd like to give a special thank you to Ian for all his hard work.  When I first thought of this model, I had no idea how much time and effort would be involved but he has truly brought the small version of the Zeiss to life and it's not even finished yet!